
Panorama Process - Sample
Developing the Panorama
The development of a panorama starts with 7 photographs that have been taken in a sequence to capture the whole 360˚ scene. The first step is to perform and initial stitch to combine them all into one image.
The Initial Stitch
In all panoramas, especially those not shot on still ground, there is quite a bit of work required to achieve the final outcome.
- In this example the images have been shot from a moving platform, a zodiac.
- The movement introduces a number of issues that have to be dealt with in post production.
- In this instance the initial stitch reveals all of the issues caused by the movement of the zodiac.
Initial Stitch
Fixing the alignment
A series of intermediary steps are taken to resolve the alignment problems.
- Individual panoramic images are created to align different planes within the image.
- The Horizon and Foreground are then merged into a single file.

Foreground Stitch
Horizon Stitch
Combined Foreground and Horizon images
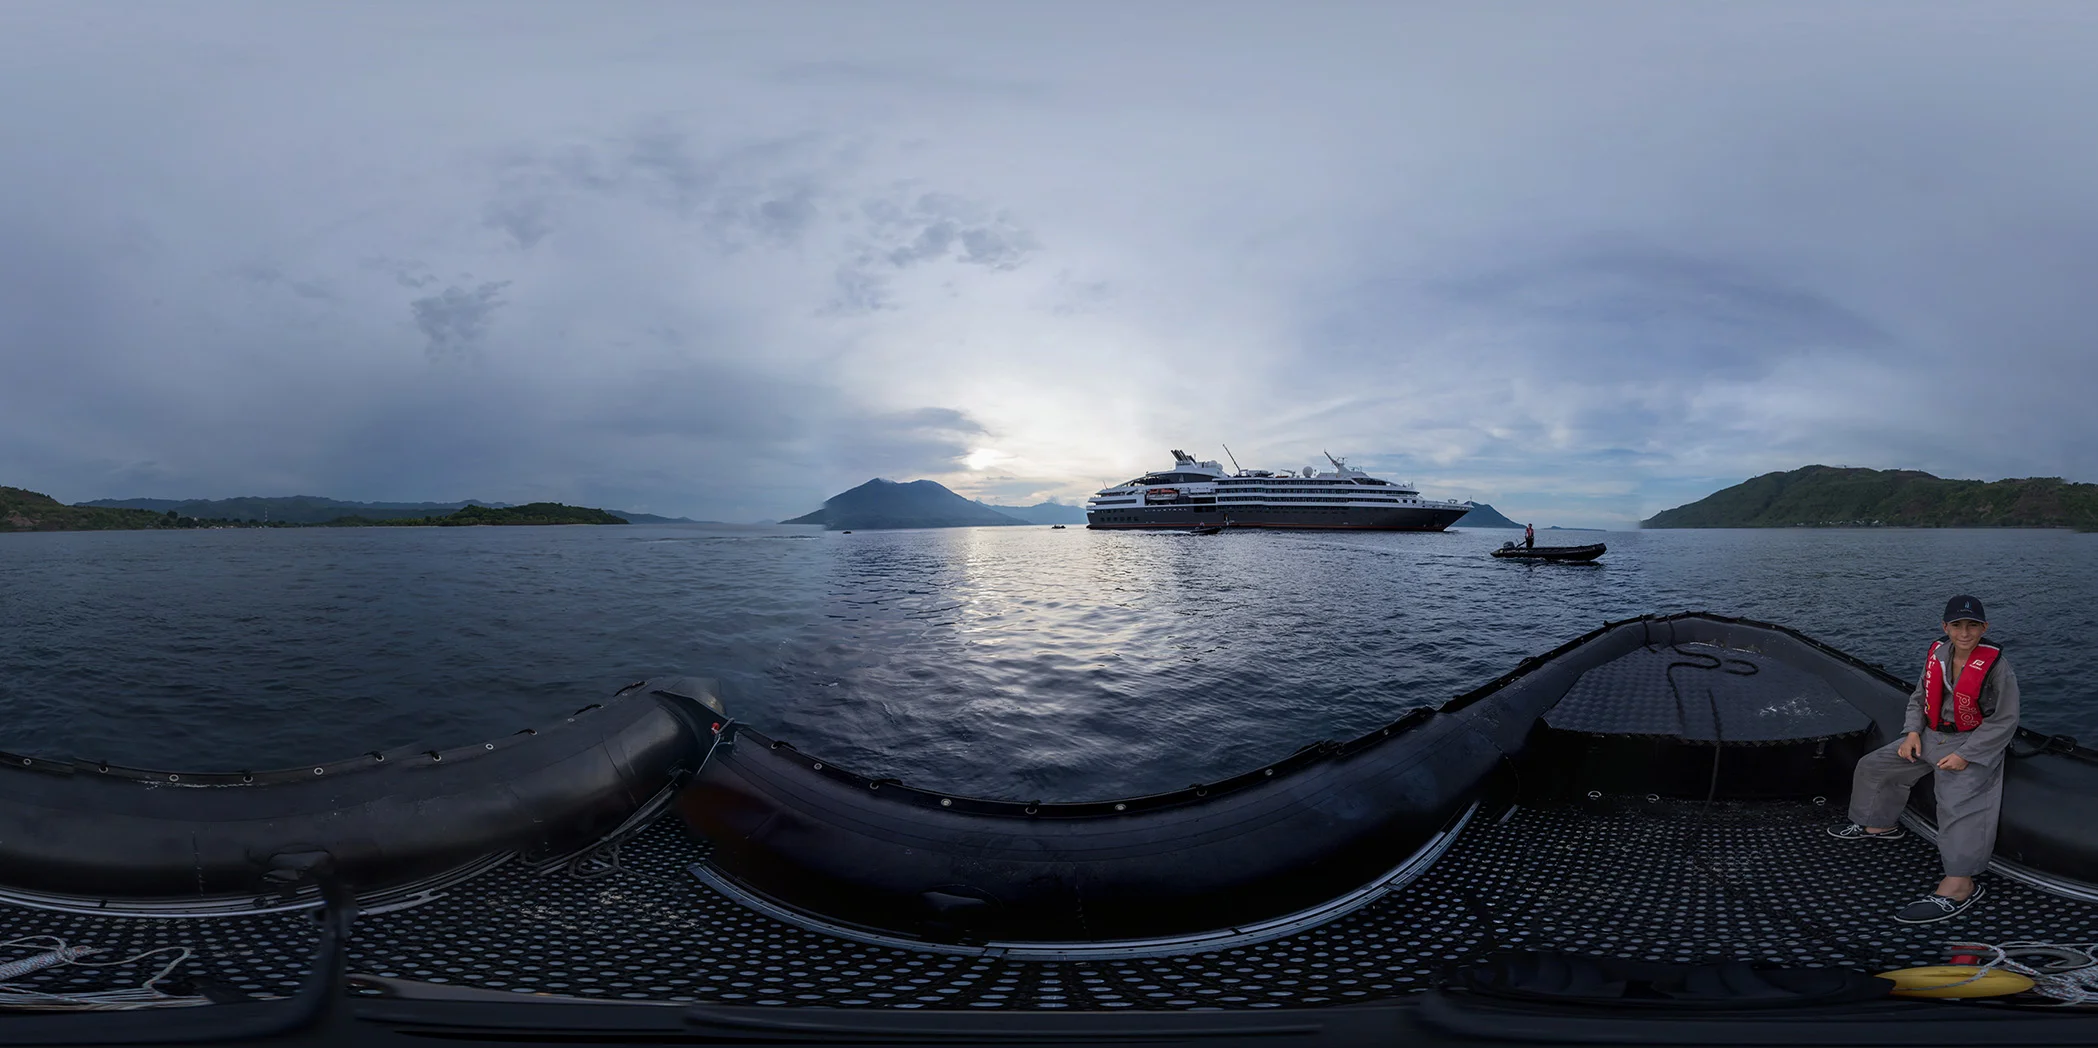
Final Retouched 360˚ Panorama image
- The final step is to retouch and merge the Foreground and Horizon together.
- The image is patched to remove the tripod and in this case the young boy.
- The image is then colour corrected and sharpened.
- In most cases the shooting platform be it on the ship or on land is reasonably stable and flat, shooting off a zodiac is an extreme case and in this particular example required a number of hours of stitching and retouching to achieve the final result.